Search This Blog

Sunday, March 2, 2014

coconutty in love

If you've followed my previous posts, you are not unfamiliar with the concept of a potluck, which is a go-to dinner plan for me and my friends (see fruit tacos and hummus for previous potluck ideas). It's an easy way for us all to gather and have plenty of food to eat and we've gotten good at having plenty of variety in what we make.

For Valentine's Day, my friends and I spent the night together and instead of a potluck for dinner, we had one for desserts. We all ordered in salads from Mixed Greens, and then dug in to the love-themed desserts we each made. I made strawberry lemonade cupcakes (see bottom right of the picture), but I will not be blogging that recipe. I wouldn't say it was exactly clean eating, but we can all make exceptions sometimes. My favorite dessert though was the cheesecake filled strawberries my friend Jess made. They were sweet but not overly filling or guilt-inducing, and perfect for a Valentine's Day treat!

Here are only some of the desserts!
Along with our dessert potluck, we had a "secret Valentine" swap. Using an online generator, each of us was assigned a friend to get a small Valentine for. Expecting to exchange small boxes of chocolate and little stuffed animals or mugs, we all just liked the elements of surprise and creativity that could go into the little gifts.

I was bracing myself to have to portion the chocolate I would receive over the next few weeks so as not to eat it all at once (which is always so tempting when you love chocolate as much as I do!), but my friend Zoe gave me such a thoughtful Valentine instead. She said that she knew I wouldn't want to have so much chocolate, and with her very creative and impressive culinary skills, she made me a whole canister of homemade granola! She put in prunes because she knows they're my favorite, toasted coconut because she said it taste great with my favorite Greek yogurt, and she gave me the recipe so that I could make myself another batch in the future!

The granola tasted amazing, and within the two weeks since Valentine's Day, my mom and I finished all of it, so today I made another batch. Forgetting that Zoe told me she cut her recipe in half for me, I made the whole thing, yielding enough granola to last us a while, regardless of how much we love it! So take the yield with caution, and you might want to cut the recipe in half!

The recipe is not limited to what I put into the granola, different dried fruits, seeds, and nuts are also suggestions to throw in there. When buying dried fruit, make sure to look for unsweetened and no-sugar-added fruit. Dried mangoes and prunes are two of the healthiest kinds of dried fruit out there, and dried banana usually has added sugar.
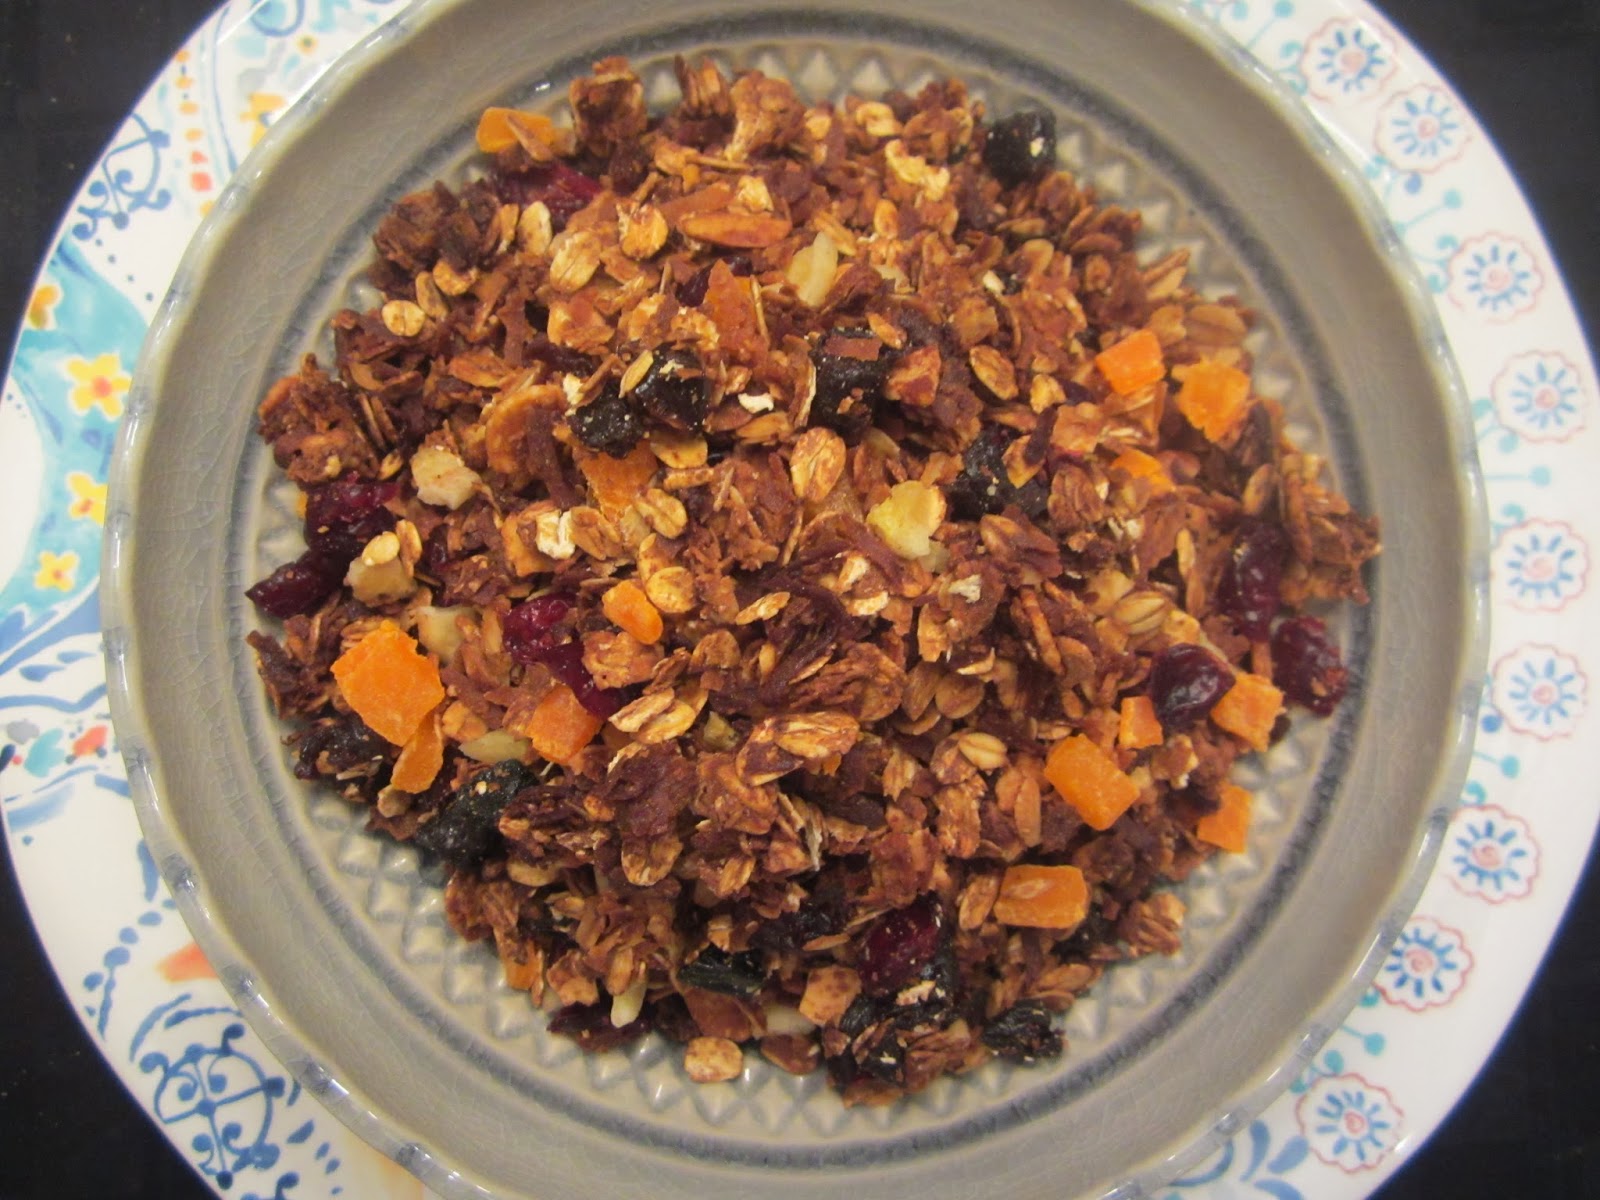


Here's what you'll need:
yields 8 cups granola (that's a lot!!!)
4 cups old fashioned oats
2 cups shredded coconut
2 cups sliced almonds
1 tbsp vegetable oil
1/2 cup honey
3/4 cup diced prunes
3/4 cup Craisins
3/4 cup diced dried mango
3/4 cup diced dried banana

1. Preheat the oven to 350 degrees. Toss the oats, coconut, and almonds together in a large bowl. Whisk together the oil and honey in a small bowl. Pour over the oat mixture and stir.


2. Pour onto two baking sheets, and bake for 25-35 minutes (depending on how crunchy you want the granola, but be careful not to burn it!)


3. While the oats are in the oven, dice up the dried fruit.


4. Remove the granola from the oven and allow to cool, stirring occasionally. Add the dried fruit.


5. Enjoy (some), and store the rest in tightly sealed container!


Monday, February 24, 2014

jicama new food

Last week I looked back at the recipes I've posted and the recipes that I've been making, and I realized they are all very much of the same. As most people do, I gravitate to my favorite foods, my familiar recipes, and my go-to snacks. Although each recipe demonstrates my persistence in clean eating and homemade favorites, very rarely do I try entirely new things.

In order to step outside of my box a little, I bought the first "new" health food that came to mind. I had tried jicama (pronounced hick-uh-muh) only once before, and I didn't know much about it. So I researched the nutrition of it and some ideas on how to eat it, and I got going in the kitchen experimenting!

Jicama is a root vegetable that provides vitamin C for skin health, fiber for bowel health, and can increase absorption of certain minerals and improve nutritional intake. There is virtually no fat and few calories in a serving of jicama. Its crisp texture is comparable to that of water chestnuts, and can be eaten raw. 

Some recipes I saw that used jicama included stir-fry, salsas, refreshing fruit salads (mangoes, pineapples, watermelons, cucumbers), and used as a "vehicle" for dips (I like the way that sounds). I also found various uses of jicama as a substitute for French fries, which is what I tried last night.


Here's what you'll need:
yields 2-3 servings
1 jicama root
olive oil to drizzle
spices to taste - I used paprika, cayenne, and chili powder

1. Preheat oven to 250 degrees F. Cut jicama in half, then slice into centimeter-wide slices (or preferred shape of fries). Slice off ends after cutting, or peel initially. 

I don't know why this picture won't upload the right way.. turn sideways for correct orientation


2. Toss jicama slices in oil and coat with spices. 


3. Bake for 45 minutes. Enjoy!!

They look very much the same before and after cooking

Friday, February 21, 2014

oh my kash[a]

When I was younger my mom used to make a dish she called "Kasha Vanishkas". That's how it was pronounced, and that's what I knew it to be. I remember picking out the bowtie pasta noodles from it and always liking the taste. So when my foods teacher told us that we were making kasha varnishkes it took me a few minutes to realize it was the same dish. It's a tradionally Jewish dish and I guess with the Yiddish pronunciation it sounded different.

The cool thing about this recipe is that kasha is roasted whole grain buckwheat groats. Buckwheat is not actually a grain, it's a fruit seed related to rhubarb and sorrel that is a great substitute for grains. It's packed with fiber, whole grain, protein, and starch. Buckwheat helps with digestion, high blood pressure and is chemical free; it grows so quickly that it doesn't require pesticides for it to grow well. Seasonally, buckwheat is a "warming food", perfect for cold weather like right now!


Here's what you need:
yields 4 servings
1/2 cup kasha, medium granulation
1 tbsp vegetable oil
1/2 yellow onion, peeled and chopped
1 cup vegetable broth
salt and pepper to taste
1 cup whole wheat pasta bowties (I used elbows instead)

1. Boil the pasta in salted water until just tender. While the pasta is cooking, heat the oil in a large saute pan and saute the onions until clear. 

2. Add the vegetable broth and bring to a boil.


3. Add the kasha. Stir and cover. 

4. Cook over low heat, sitrring now and then until the kasha is tender (about 5 minutes). Drain pasta well and stir into kasha. Add salt and pepper to taste.
5. Enjoy!!!


*Fun fact: The pan was slanted on the stove top (look at the picture of the onions, oil, and broth in the black pan), so we changed pans in midway through this recipe. Did you notice the difference in pans?

Sunday, February 16, 2014

burning more than calories

I'm usually not one to count calories, but this past week I've been using the My Plate App on my phone to log all the food I eat (and all the exercise I do) to calculate my net caloric intake each day, with a breakdown by meal and by nutrients in my diet. By writing down everything I eat, that in itself deters me from snacking extra and eating one more of this/one more of that. It has made me a little more conscious of serving sizes and how many calories certain foods really have.

On top of this, in my AP Psych class this week we've started learning about motivation and emotion, and one major topic in the chapter is eating and hunger. For this week (coincidentally the same week I started logging my food for myself), our homework assignment is to document what we eat (not as focused on how much and what ingredients) and when, where, why, and how we eat it. From our data, we will asses whether or not we demonstrate the facts of psychology of eating and social norms of our culture when it comes to food.

We have yet to rip apart our eating habits in class, but for my own benefit I've looked at what I eat and most of my "why" responses are that I'm hungry, rather than just because I'm bored, sad, distracted, etc. It's something important to think about when eating.. Why are you eating? If it's not because you're hungry, maybe you can hold off for a bit. And just a fun fact: not only does an empty stomach make us hungry, but a hormone called ghrelin, produced in the gut, acts as a hunger hormone that sends hunger signals to the brain which makes you hungry.

This afternoon when both my stomach and brain were in sync and signalling hunger to me, I decided to make my own type of veggie burger. Although I'm not a vegetarian, veggie burgers are one of my favorite meals. With pita for flat bread, I always seem to pile my burger high with salsa, avocado, Sriracha, greens, cheese, etc. It becomes really filling and packed with seemingly endless nutrients.

My chipotle black bean burger was a perfect lunch that left me feeling full but not bloated, and really mimicked an actual burger in its texture. Spicy and bursting with a Mexican flavor, the burgers made my house smell like Mexico while providing me with plenty of protein to keep me full all afternoon (and keep me from munching on snacks that I know I don't need).

The only thing missing... was a side of sweet potatoes. Beans and sweet potatoes go great together, and I had been heating up half a sweet potato for myself. Turns out I got so caught up in the burger making though, that the sweet potato burned and my kitchen filled with smoke a smell of burnt food. Unfortunately, the smell overpowered the smell of Mexico, but I'm glad I caught the sweet potato before it turned to disaster.


Here's what you'll need:
yields 4 burgers
1-15oz can black beans, drained and rinsed
1/2 onion, chopped
2 cloves garlic, minced
1/2 tsp cumin
1/4 cup chunky salsa
2 baby red peppers
3/4 cup whole wheat bread crumbs (I used Chipotle flavored)
1 egg white

1. In a food processor, add half the black beans, onion, garlic, and cumin. Pulse until smooth.


2. Chop peppers into small 1cm cubes. Remove mixture and add to a bowl with remaining beans, salsa, peppers, bread crumbs, and egg white. Mix well until all of the contents are wet and "glued" together by the egg.


3. Heat skillet and drizzle with oil. Shape a fourth of the bean mixture into a patty and cook each patty for 3-4 minutes on each size, or until firm and golden brown. (I was still experimenting and left my for a little too long, so one side got a bit burnt - goes along with today's theme I suppose).


4. [Optional!] Add your favorite burger toppings to a piece of whole wheat bread and enjoy! I toasted half a Pepperidge Farm Whole Wheat Deli Flat, smeared a bit of whole grain mustard on the toast, added a bed of spinach, and topped with avocado and Sriracha for a perfect open-faced burger!


Friday, February 7, 2014

no knead for grains

This may be one of the most interesting recipes I've tried, and I definitely can't take credit for the idea - it's been all over the blogging world! Whoever thought to make pizza crust out of cauliflowers must have made some dough off of the idea. It's a pizza cake to follow this recipe (not a real cake - pun intended) and I know I'm getting cheesy here but sometimes I can't help it.

In actuality though, a cauliflower pizza crust is a great gluten-free idea for those intolerant or allergic, or those who just want to minimize simple carbs and processed foods from their diets. Cauliflower is low in calories but high in fiber and vitamin C and works as a great substitute for a conventional crust.

I will warn you that the taste is not exactly comparable to eating a flour pizza crust, but surprisingly enough, it isn't exactly like eating cauliflower either. Depending on how much water you are able to wring out of the microwaved cauliflower depends on how crumbly the crust will turn out, and this is one of those recipes in which patience is a virtue. Make sure you wait for the cauliflower to cool before wringing out the water, and wait until the pizza is cooled before cutting it. Otherwise it will be a little difficult to pick up a piece and eat it with your hands - I ended up eating my pizza with a fork.

Ultimately though, possibly kneading to eat with a fork is a small price to pay for such an inventive and healthy meal.

Here's what you'll need:
yields one 10-12 inch crust

2 small heads of cauliflower
1/4 tsp kosher salt
1/2 tsp dried basil
1/2 tsp dried oregano
1/2 tsp garlic powder
1/4 cup shredded Parmesan cheese
1/4 cup mozzarella cheese
1 egg

1. Place a pizza stone in the oven (or a baking sheet if you don't have a stone). Preheat the oven to 450 degrees. On a cutting board, place a large piece of parchment paper and spray or coat with a thin layer of oil.

2. Wash and thoroughly dry cauliflower. Cut off most of the stems and pulse in a food processor until you get a powdery consistency.


3. Place cauliflower in a microwave safe bowl and over. Microwave for 4 minutes. Dump cooked cauliflower onto a clean towel and allow to cool.


4. Wrap cauliflower in the tower and wring out as much water as you can (this will get a chewier consistency rather than crumbly).


5. Add cheeses, salt, basil, oregano, and garlic powder to wrung out cauliflower. Add the egg and form into dough (use your hands!)


6. Form the dough into a crust on the oiled parchment paper. Pat down thoroughly - not too thick or too thin. Bake for 8-12 minutes, or until the crust starts turning golden brown.


7. Remove from oven and add your choice of sauce, cheese, and toppings! (I used regular tomato sauce, shredded fresh mozzarella and Parmesan, jalapenos, mushrooms, and bell peppers). Cook for another 5-10 minutes until the cheese is melted and your vegetables are slightly softer.


8. Wait for the pizza to cool. Enjoy!!