Search This Blog

Sunday, September 22, 2013

orange you excited?

Lately I've been super busy.. getting back into the swing of things at school and trying to get all my college applications done. I love being busy though and I love knowing I have a full week ahead, even though I have to be at school tomorrow at 6:30 to make something up in my bio class. That's why this breakfast is perfect - it's super easy and pretty filling.

For on-the-go mornings, this hidden green smoothie is tangy and delicious, and you would have no idea there's spinach in it... except that I just told you.. oops!

Smoothies are a great way to start your day if you're one of those people that doesn't like to eat breakfast. This smoothie is packed with everything you need to get you going; the berries offer many vitamins and minerals, as well as disease-fighting antioxidants and fiber for digestion. Orange juice, although sugary, provides a significant amount of vitamin C, protects against inflammation, and decreases bad cholesterol levels. Spinach - the not-so-secret ingredient - is one of the most nutritious foods there is. Low in calories and high in vitamins, spinach is something called nutrient-dense, which means that for the amount of calories, it is very rich in nutrients. Spinach also improves cardiovascular health, has cancer-fighting antioxidants, and improves brain function.


Here's what you need:
yields 2 servings
1 cup orange juice 
2 cups mixed frozen berries
1 1/2 cup loosely packed spinach 


1. Add all ingredients to the blender. Blend on "liquify" until all chunks and green specks are gone. 


2. Enjoy!


Tuesday, September 17, 2013

shuka it up

As I promised when I got back from Israel, I have here a recipe for the sauce that goes with a very popular breakfast there, called Shakshuka. The tomato sauce is filled with vegetables, and it's very easy to add anything that you want to it. So far my family has made this with zucchini in it, and with okra. 

In order to make Shakshuka (which I haven't done yet), poach an egg and place it in a bowl of this sauce. It's a perfect breakfast and is certain to keep you full until lunch. The egg is a great source of protein, and the vegetables start your day off well. Tomatoes, which are the main ingredient, are good for weight control, immunity, heart disease, and osteoporosis. This is also just a great way to fit tomatoes into your diet if you don't like them (like me!). No matter how much I try, I can't get myself to eat a slice of tomato; making such a good sauce like this makes it easy to eat tomatoes though!

You could either make this as a side dish with the vegetables in it (zucchini, okra), you could make
Shakshuka out of it, or even just put this homemade tomato sauce on pasta and call it a dinner!

This recipe is very flexible, and if you want to add more or less of certain ingredients, you can! It's up to you to shak[e] it up however you want!

Here's what you need:
yields a lot of sauce
1 can fire roasted diced tomatoes
28 oz can crushed tomatoes
1 can tomato sauce (no salt added) 
5 garlic cloves
2 small onions
8 oz mushrooms
crushed red pepper (as much as you want)


1. Cut up onions and mushrooms. Mince garlic.


2. In a large pan or Wok, saute garlic and onions, then add in mushrooms and saute. 


3. Add in fire roasted tomatoes, then crushed tomatoes, then tomato sauce and mix all together. Add in crushed red pepper. Simmer until all the flavors have come together.


4. Enjoy!


Resource: http://www.livestrong.com/article/408302-tomato-health-benefits/


Saturday, September 7, 2013

stepping into my roll

Summer is coming to an end, and with the beginning of school comes all the roles I have to fit into again. Student, club leader, college applicant (yikes!), and of course blogger! Before summer ended though, I had a potluck dinner with some of my friends and my role was to bring a side dish. So I decided to bring southwestern spring rolls; something different and new to try, plus loaded with veggies!

I've learned through each potluck I cook for that if we all make super filling dishes, none of us end up feeling good at the end of the night. That's why I thought these spring rolls would be good. All of my friends have learned not to make super heavy dishes (and to make healthy ones!), and that way we all can enjoy everything without feeling guilty for it afterwards.

Another successful potluck!

These spring rolls are packed with vegetables and spices, and although I wouldn't make these often (it's tedious to roll them one by one), I found it interesting to learn how to. I also wouldn't make them often because I don't like to used pre-packaged wrappers - they were a little higher in salt than I would like but I didn't have the time to make my own wrappers from scratch.

*I'm not sure if all spring roll wrappers follow the same instructions, but I just followed what the back of the package directed me to do

Here's what you need:
yields 12 spring rolls
1 cup canned corn
1/2 can black beans, rinsed and drained
5 ounces frozen chopped spinach, thawed and squeeze dried
3/4 cup cheese blend (I used Monterey Jack)
2 ounces (1/2 can) chopped green chilies, drained
2 green onions
1/2 tsp cumin
1/2 tsp chili powder
1/2 tsp salt
1/2 tsp pepper
1/4 tsp cayenne pepper
1 package spring roll wrappers 

1. Preheat the oven to 425 degrees. In a large bowl, combine all ingredients (except the wrappers).

I microwaved my spinach for 20 seconds to thaw it out 


2. Fill a tin with warm water and submerge the wrapper  for 15 seconds. Once it's sticky, dry it in a towel and fill it with a spoonful of the vegetable mixture. Fold sides toward the center over filling and roll tightly to seal.


Look really closely and you can see the wrapper on the towel


I used the knife to cut off some of the extra wrapper, I think it was too big 
3. Bake for 5-10 minutes. Make sure not to remove from baking sheet until they've cooled a little bit (the thin wrappers will open up!)


4. Enjoy!!


Tuesday, September 3, 2013

drinking too much coffee causes a latte problems

Yesterday ended all the traveling I've done for the summer, and as great as the places I went were, I'm happy to be home. The main journey of my summer was to Israel, the first time I've visited another country! Now that I'm home though I've brought back a lot of recipes with the Mediterranean style which I really liked while I was there!

SPOILER: In Israel they eat a lot of vegetables (my favorite), so get ready for plenty of new Mediterranean dishes coming up!

One of the not-so-healthy treats that I loved to get while I was in Israel though was their iced coffee. Instead of just making coffee and sticking ice cubes in it, Israeli iced coffee is more of a slushy type drink. There's one chain of cafes (I would sort of compare it to Panera Bread) called Aroma and they have the best iced coffee in Israel.


Now that I'm home and missing the delicious drink, I tried making my own version of it. Of course it's not as perfectly sweet because I didn't add all the sugar in, but it tastes good and it's easy to make! Plus I'm still trying to enjoy the last bits of summer, and this frozen coffee is perfect for my denial that summer is ending.

 I'm not a huge coffee drinker because I don't let myself drink it so much - I don't want to get hooked on it (because I know I will!) not yet at least! There are a lot of benefits from coffee though. It can help with both long- and short-term memory improvement, lower risk of diabetes, boost your metabolism, and there are actually a lot of antioxidants in coffee (more than in some fruits and vegetables!). Drinking coffee in moderation (and without all the added sugars and creamers) can be very beneficial to your health!


Here's what you need:
yields 1 mug iced coffee
1 cup of coffee (as you like it) - I used vanilla almond milk to make it sweeter

1. Make your cup of coffee in a mug you can freeze.

2. Freeze the coffee for 6 hours, mixing it around halfway through.

3. Enjoy!


Resources: http://www.livestrong.com/article/557242-how-drinking-coffee-could-improve-your-health/

Tuesday, August 13, 2013

the Reese to finish

Over the past few days I've been trying hard to finish as much of my summer work as I can, just to get it out of the way. The other day, a group of my friends came over to do the summer math assignment - like we do every year - and we found it must more straining that usual. They got to my house at about 1:30, and our goal was to finish the 30 problems by 4. Little did we know that in order to complete most of the problems, we had to teach ourselves the basic concepts from Chapters 1 and 2 of our new Statistics book. So it took a little longer than we expected. And when I say a little I mean that by 5:45 I told them all to go home because I was going out to dinner with my family and had to get ready. We didn't even finish all the problems! In addition to the Stat work, I have a whole lot of Biology work, which has been taking up most of my free time. I just finished reading and taking notes on all the 5 chapters I needed to (yay!!), and to celebrate I decided to make homemade Reese's Peanut Butter Cups.

I found a recipe on another blog for peanut butter fudge, so I changed it up a bit and made it my own in order to make these delicious little snacks. There's no added sugar, but instead a little bit of honey. I also chose to use natural peanut butter, which is a better alternative to the very processed and sweetened peanut butter choices.


Just bare in mind that today was the first day that I made these and that's why in the pictures some of the peanut butter isn't covered all the way for about half of the tin. I was still figuring out how much peanut butter to be putting in each cup! It's totally up to you though, you can always add more or use less to accommodate what you want!

These "Reese's" are a perfect size for a quick snack to pop into your mouth when you're in the mood for a mini celebration, whether you're celebrating biology accomplishments or just the fact that it's still summer!

Whatever your celebration may be, enjoy it with good food!


Here's what you'll need:
yields 24 mini-cupcake sized cups
1/2 cup coconut oil
1/2 cup cocoa powder
1/4 cup creamy peanut butter
1/4 cup honey
1/2 teaspoon vanilla 

1. Melt the coconut oil in a small saucepan.


2. Mix all other ingredients in a food processor.


3. Line the mini cupcake tin with paper liners.

4. Pour enough of the cocoa mixture in each cup so that the bottom is covered. Then scoop about a 1/2 teaspoon of peanut butter into each cup. Cover the peanut butter layer with another layer of chocolate.


5. Freeze for an hour, and then keep refrigerated. Enjoy!


Friday, August 9, 2013

it's about lime [I eat some good food]!

So.. I'm back from camp now, and one of the only two things that I've been enjoying since Sunday is the food (the other one is my family). You see, every summer when I get back from camp I get into this "post-camp depression" phase, where all I want to do is stalk my own album of camp pictures of Facebook, call/text/hang out with my camp friends, and talk about camp to just about anyone I see. (Here's a hint: I'm still in that mood).

Camp this summer was amazing as always; it was my first time being a counselor, and I was lucky enough to get assigned to a great group of 12 year old girls. My bunk had so much fun all the time, and it was a great experience being able to give to these girls everything I love about camp and I already miss them all so much.

And of course I miss my best friends too. Having periods off during the day and nights off at night were the greatest times because we all got to spend them together. All of the counselors this year became really close, and we were all devastated to be leaving each other after only 6 weeks together. (No worries though because since Sunday I've already seen a whole lot of my friends three times).

But we spent a lot of our free time doing on nights off eating, and to add to the camp menu that doesn't exactly follow the eating style that I keep at home, I didn't eat as many fruits and vegetables as I would have liked. I even admit to trying a Big Mac at McDonald's on one of my nights off. I agreed to try whatever my friend was getting, thinking I'd take a bite and that'd be that just to entertain him. Instead, it turned into a whole scene with every one of my friends surrounding me videotaping or taking pictures. They were all in shock to be watching me eat anything from McDonald's, let alone a Big Mac. But I took a bite of the greasy burger to entertain everyone. One bite won't kill me, I know, I just don't enjoy so much grease and meat all put together.

Tada!! My Big Mac experience
I don't regret any of the ice cream or Big Mac bites from the summer, though. I kept my portion control pretty on target all summer and I tried my best to have as much of each nutrient a day as I could. My bunk always knew that if I was spooning out a little cup of peanut butter at a meal I wanted my protein, and I must have eaten more peaches and plums than anyone else in camp. Additionally, I woke up most mornings (at least I tried) and went for a run around camp or down the long camp road with my friend Ari, and I taught aerobics with my co counselor Alex as well (thank you Nike Training Club App for getting us through that one!!). Plus I went to all the activities with my bunk and was moving nonstop all summer.

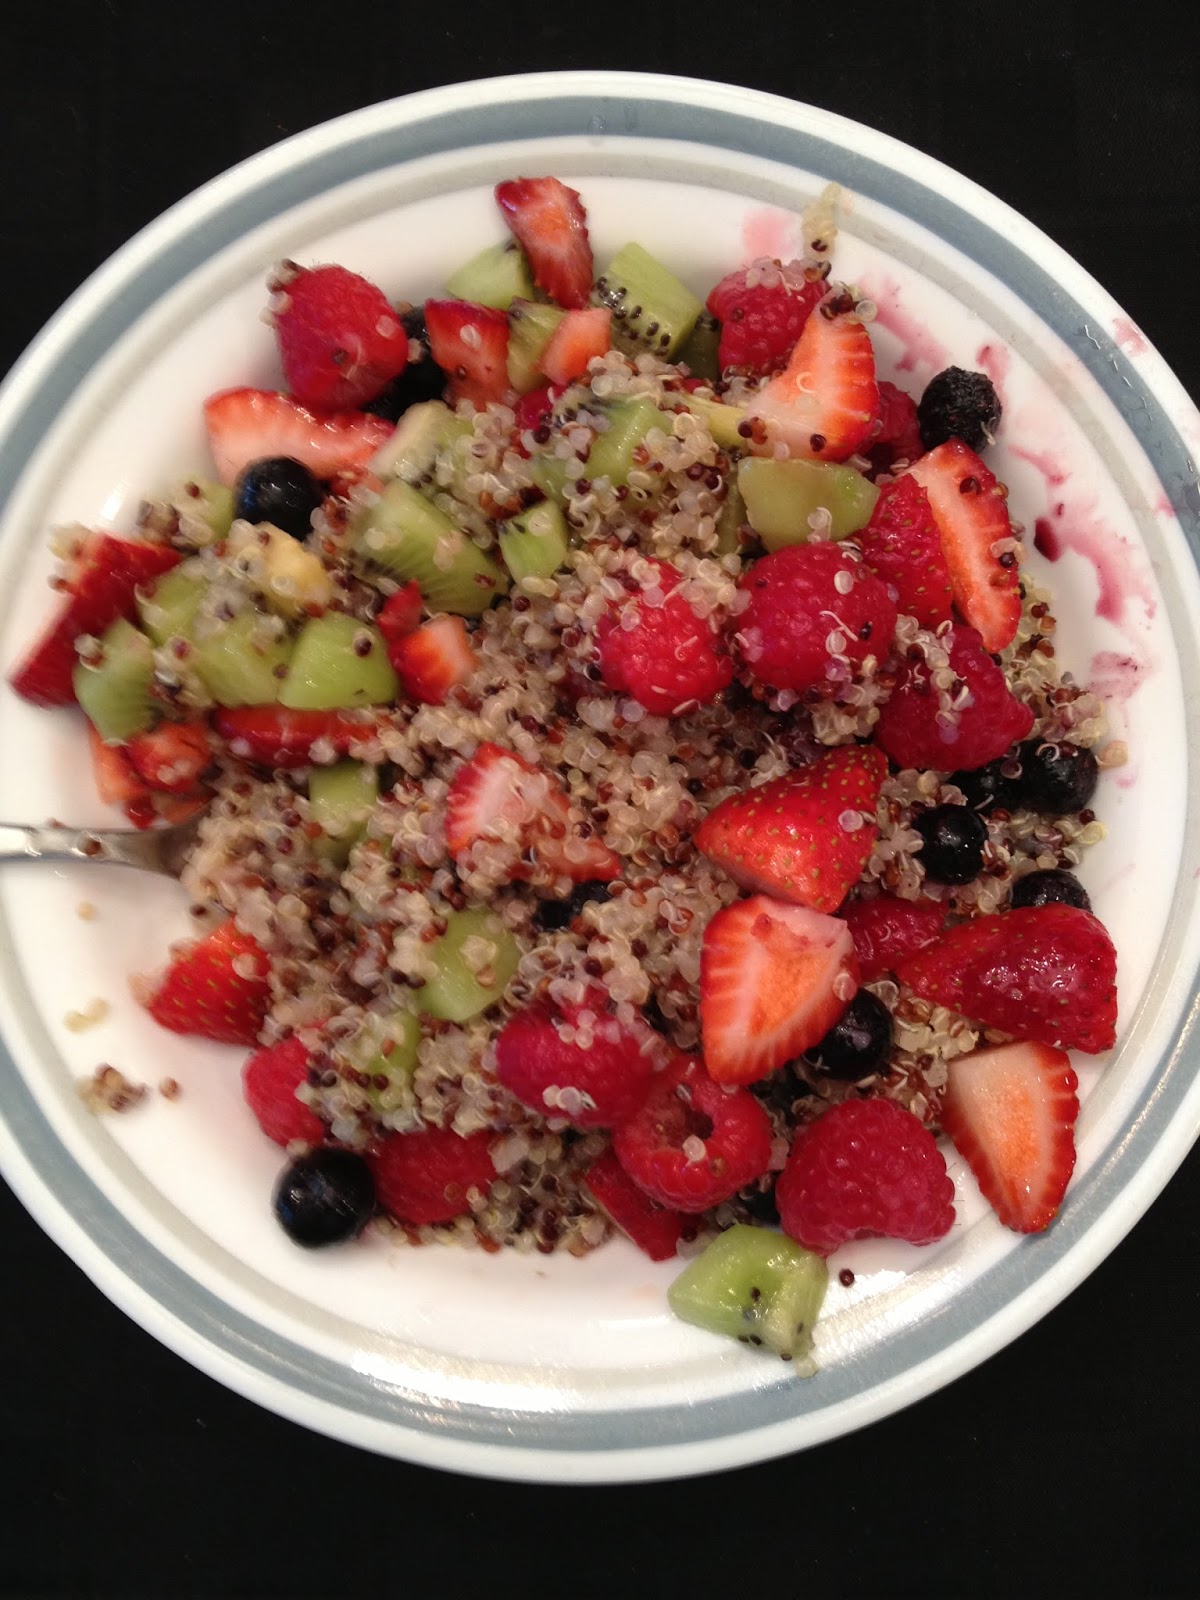
Nonetheless, I was excited to be able to open the fridge at home and just eat an apple... or some strawberries.. or string beans.. anything! Yesterday come lunchtime, I was looking through my Pinterest and found a good quinoa fruit salad and I made it for lunch for myself. It was perfect; loads of delicious fruit and quinoa for protein and carbs (and I just found out that it has 20% DV of iron!). This honey- lime quinoa salad was so easy to make, and you can really use whatever fruit you want in it.


Here's what you'll need:
yields 1 big serving or 2 small servings
1/2 cup quinoa
1 cup water
juice from 1/2 a lime
1 1/2 tablespoons honey
1/2-3/4 cup blueberries
1/2-3/4 cup raspberries
1/2-3/4 cup strawberries
1 kiwi

1. Rinse the quinoa under cold water. Add quinoa and water to a pan and bring to boil. Boil for 5 minutes, then turn heat to low and simmer until all the water is absorbed.


2. Whisk together lime juice and honey to make the honey-lime dressing.


3. Combine cut fruit and quinoa. Pour dressing on top and mix until well combined. Enjoy!!